Excel, a powerful tool for data management, offers various ways to manipulate columns and rows, essential for efficient data organization. But when it comes to organization, do you know how to move columns in Excel? This comprehensive guide covers numerous methods to move, transpose, and manage columns in Excel across different versions and platforms, including Windows, Mac, and online versions.
- Moving Columns in Excel
- Transposing Data: Columns to Rows and Vice Versa
- Moving Columns in Excel on Mac and Excel Online
- Dealing with Excel Tables and Pivot Tables
- Moving Multiple Columns and Rows
- Advanced Techniques
- Handling Common Challenges
- Conclusion
- FAQs
Moving Columns in Excel
Let’s start by exploring the fundamental techniques for moving columns in Excel, a key skill for organizing your data effectively.
Example: Suppose you have a column ‘B‘ with monthly sales data. To move this to the position of column ‘A‘, click on the header of column ‘B‘, drag it to the left of column ‘A‘, and release. Column ‘B‘ will now become the new column ‘A’.
Excel Select and Drag Column
- Basic Column Movement:
- Select and Drag: Click the column header, drag it to the new location. This method works well for moving a single column.
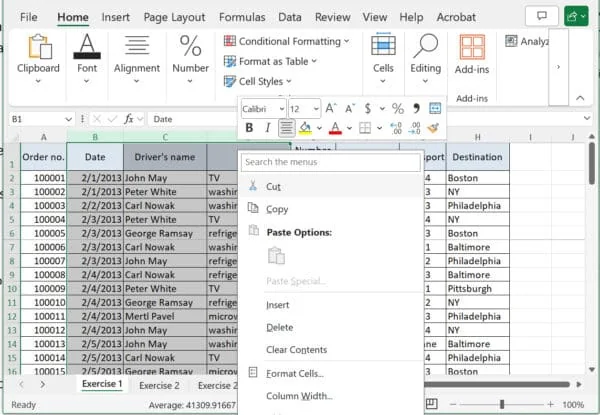
- Cut and Paste: Right-click the column, choose ‘Cut,’ then right-click the destination and select ‘Insert Cut Cells.’ This method is useful for precise placement.
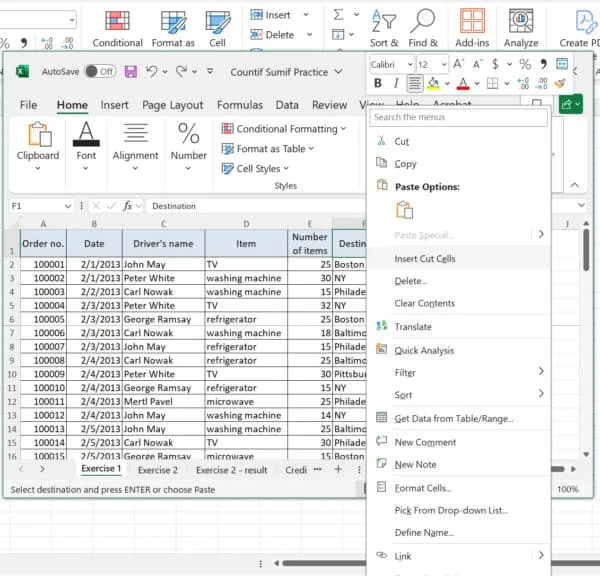 Excel Inserting Cut Cells
- Using Keyboard Shortcuts: Press Alt + E, then M, and use the arrow keys to move the column. Press Enter to place it.
- Moving Columns without Replacing:
- To move a column without overwriting existing data, use the ‘Insert Copied Cells’ option available in the right-click context menu after copying a column.
Excel Insert Copied Cells
Transposing Data: Columns to Rows and Vice Versa
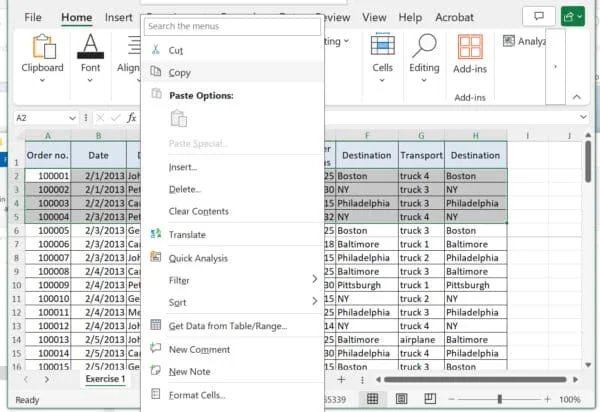 Excel Copy Data
Discover how to change the orientation of your data by transposing columns into rows and vice versa, an essential trick for data restructuring.
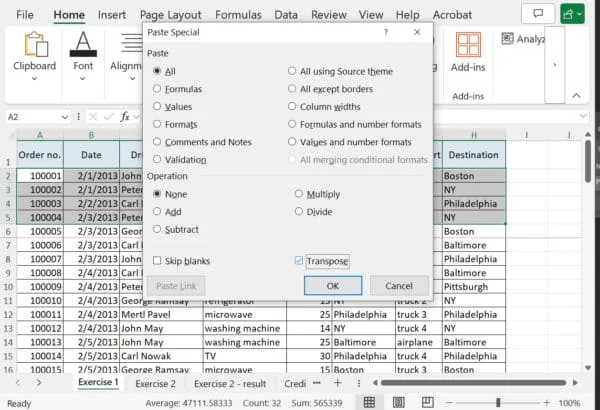
Example: Imagine you have data in columns A, B, and C that you want to transpose into rows. Copy the data, right-click on the destination cell (say, cell ‘D1‘), choose ‘Paste Special,‘ and then tick the ‘Transpose‘ checkbox.
 Excel Transpose
- Using ‘Paste Special‘ to Transpose:
- Copy the column you want to transpose.
- Right-click on the destination cell.
- Choose ‘Paste Special‘ then select the ‘Transpose‘ checkbox.
- Transposing Without Formulas:
- If you need to transpose values only, use the ‘Paste Values‘ option in ‘Paste Special‘ after transposing.
Moving Columns in Excel on Mac and Excel Online
Tailoring our approach, we’ll examine how to efficiently move columns in Excel when working on a Mac or using Excel Online.
- Excel for Mac:
- The methods are similar to Windows. However, keyboard shortcuts may vary (e.g., using Command key instead of Ctrl).
- Excel Online:
- While Excel Online has similar functionalities, some advanced features might not be available. Basic drag-and-drop and cut-paste methods work effectively.
Dealing with Excel Tables and Pivot Tables
Now, let’s delve into the nuances of manipulating columns within Excel Tables and Pivot Tables, ensuring data integrity in these structured formats.
- Moving Columns in Excel Tables:
- Drag-and-drop or cut-and-paste methods work, but be mindful of the table’s structure and formulas.
- Example: To move column ‘Sales‘ to the left of column ‘Year‘ in a table, click and drag the ‘Sales‘ column header to the left of the ‘Year‘ column header.
- Pivot Tables:
- To move columns in a pivot table, drag the fields in the PivotTable Field List. This will rearrange the columns in the pivot table view.
- Example: In the PivotTable Fields pane, drag the ‘Region‘ field above the ‘Sales‘ field to rearrange the columns in the pivot table.
Moving Multiple Columns and Rows
Handling multiple columns and rows simultaneously can be tricky; this section provides strategies for managing them effectively.
 Excel Moving Multiple Columns and Rows
Example: To move columns ‘B’, ‘C’, and ‘D‘ between columns ‘F‘ and ‘G‘, select columns ‘B‘ to ‘D‘, cut them (Ctrl+X), right-click the header of column ‘F‘, and choose ‘Insert Cut Cells‘.
- Selecting and Moving Multiple Columns:
- Hold the Shift key to select adjacent columns or Ctrl key for non-adjacent columns, then use the drag-and-drop or cut-and-paste methods.
Advanced Techniques
For those seeking more sophisticated solutions, we explore advanced techniques for moving columns without disrupting your spreadsheet’s functionality.
Example: If you want to move column ‘B‘ to column ‘**D’**s position without affecting formulas, first change any relative references in your formulas to absolute references. Then, move column ‘B‘ as needed.
- Moving Columns without Affecting Formulas:
- Ensure that cell references in your formulas are appropriate (absolute or relative) before moving columns.
- Moving Data from Multiple Columns to a Single Column:
- This can be done using a combination of transposing and concatenating functions or using Excel’s advanced data tools like Power Query.
- Moving Data from Columns into Rows (and Vice Versa):
- Apart from transposing, complex rearrangements might require the use of functions like INDEX, MATCH, or array formulas.
Handling Common Challenges
Encountering obstacles is part of the process; here, we’ll address common challenges in column management and how to overcome them.
Example: To move a column without overwriting data, copy the column, right-click the destination column, and select ‘Insert Copied Cells‘ instead of ‘Paste‘.
- Preventing Overwriting Data:
- Always make sure to insert or shift cells rather than simply pasting over existing data.
- Managing Non-Contiguous Columns:
- Use the Ctrl key to select non-adjacent columns. However, moving non-contiguous columns together might require multiple steps.
- Maintaining Data Integrity:
- Double-check data references and integrity, especially when working with large datasets or complex formulas.
Conclusion
To wrap up, mastering these column management techniques in Excel will empower you with the skills needed for advanced data manipulation and organization.
Mastering column management in Excel can significantly enhance your data manipulation capabilities. This guide covers a wide range of scenarios, from basic movements to advanced data rearrangement techniques, applicable across various Excel versions and platforms. Regular practice and experimentation with these methods will lead to more efficient and error-free data management in Excel.
FAQs
How to Move Columns in Excel Without Overwriting?
To move columns in Excel without overwriting existing data, first select the column you want to move. Right-click and choose “Cut” or press Ctrl+X. Next, right-click on the header of the column where you want to move your cut column, and select “Insert Cut Cells.” This will shift the existing columns to the right without overwriting them.
How to Move Columns to Rows in Excel?
To transpose columns to rows in Excel, first select the columns you want to move. Right-click and choose “Copy” or press Ctrl+C. Then, select the cell where you want to paste these as rows. Right-click, select “Paste Special,” and in the dialog box, check the “Transpose” option before clicking OK. This will convert the copied columns into rows.
How to Move Rows to Columns in Excel?
To convert rows into columns in Excel, begin by selecting the rows you wish to move. Right-click to copy them or use Ctrl+C. Next, click on the destination cell where you’d like the columns to begin. Right-click, select “Paste Special,” and then choose the “Transpose” checkbox in the dialog box, followed by OK. This action will transpose the selected rows into columns.
How to Move Multiple Columns in Excel?
To move multiple columns in Excel, first select the range of columns you want to move. Cut the selection by right-clicking and choosing “Cut” or pressing Ctrl+X. Then, right-click on the header of the destination column and select “Insert Cut Cells.” The selected columns will be inserted into the new location, and existing columns will shift accordingly to accommodate them.
