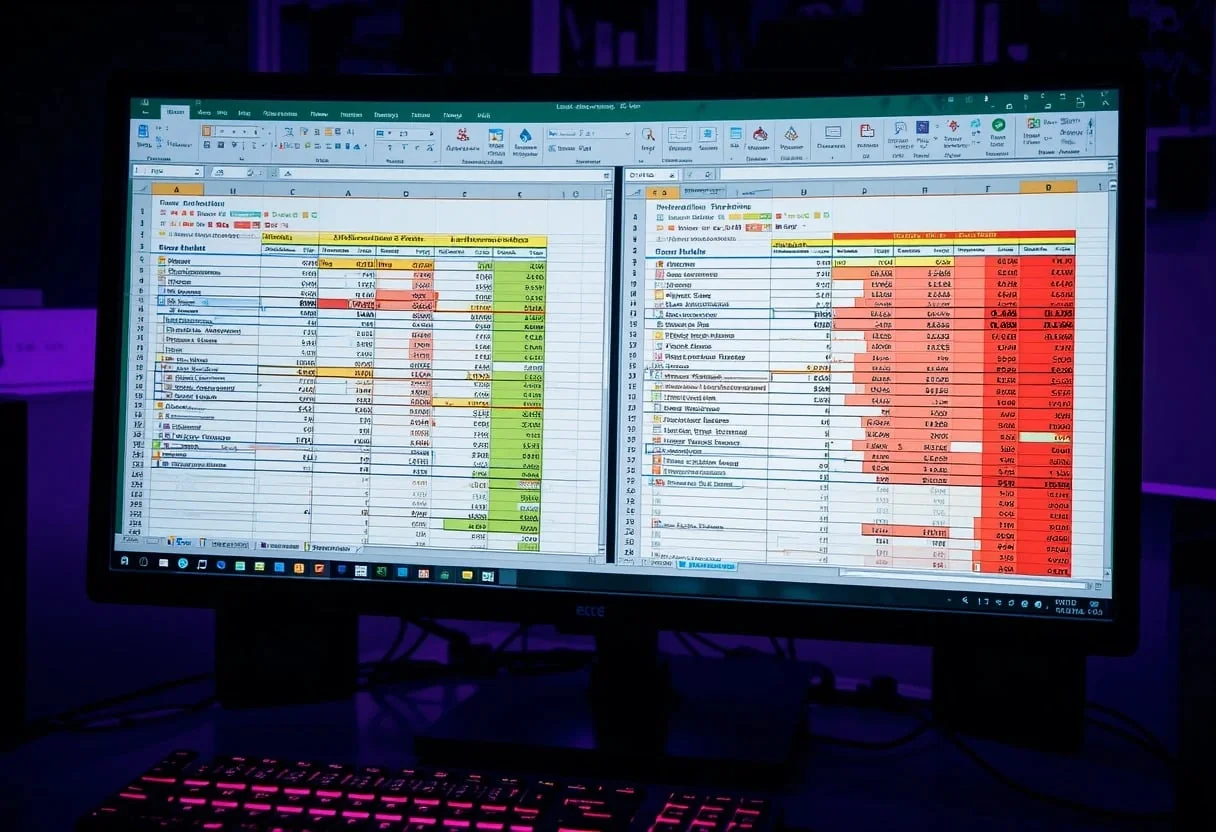
The Excel Sheets Side by Side feature allows you to compare data across multiple worksheets simultaneously. By using the View Side by Side option, you can analyze financial reports, track changes, and improve workflow efficiency with ease.
I often need to analyze complex financial models across multiple sheets. The ability to view sheets side by side has dramatically improved my efficiency. It’s particularly useful when I’m reconciling data or comparing forecasts against actuals.
To set this up, I typically open both sheets I want to compare, then navigate to the View tab and click on “New Window” From there, I select “View Side by Side” This simple process has saved me countless hours and reduced errors in my financial analyses.
Key Takeaways
- Viewing sheets side by side enhances data comparison and analysis
- Excel’s View Side by Side feature allows simultaneous scrolling of multiple sheets
- This technique significantly improves productivity for complex financial modeling tasks
Understanding Excel’s Work Environment
Excel’s work environment is designed for efficient data analysis and financial modeling. I’ll explain the key components that enable seamless workflow and productivity.
Navigating the Excel Ribbon
The Excel Ribbon is my command center for accessing tools and functions. It’s organized into tabs like Home, Insert, and Data. Each tab contains groups of related commands.
I frequently use the Formulas tab for financial modeling. It houses functions for complex calculations. The Data tab is crucial for importing and manipulating large datasets.
Quick Access Toolbar is my go-to for frequently used commands. I customize it with buttons for Paste Values, Sort, and Filter. This saves me time when working on financial reports.
Keyboard shortcuts boost my productivity. Ctrl+C for copy, Ctrl+V for paste, and Alt+= for AutoSum are staples in my daily work.
Managing Excel Workbooks
I use multiple workbooks to organize complex financial models. Each workbook can be viewed in its window since Excel 2013.
To compare data across sheets, I often view two worksheets side by side. This helps in cross-referencing financial statements or analyzing different scenarios.
The Active Workbook is the one I’m currently working on. I can switch between open workbooks using Ctrl+Tab. This is handy when juggling multiple financial reports.
In the Window group of the View tab, I find tools for arranging workbooks. “New Window” creates a second view of the active workbook, perfect for viewing different sections of large datasets simultaneously.
Setting Up Your Workspace
I’ll guide you through optimizing your Excel workspace for side-by-side analysis. This setup enhances productivity and accuracy when comparing data across sheets.
Opening Workbooks in New Windows
To begin, I always open each workbook in a new window. This gives me more control over the layout. Here’s how I do it:
- Open Excel and click “File” > “Open”
- Hold Ctrl while clicking on multiple workbooks
- Press Enter to open them in separate windows
This method allows me to view files in split and multiple windows, giving me maximum flexibility.
For workbooks already open, I use the “New Window” button on the View tab. This creates a second view of the same workbook, perfect for comparing different sheets.
Optimizing the View for Analysis
Once I have my workbooks open, I optimize the layout:
- On the View tab, I click “Arrange All“
- I choose “Vertical” in the Arrange Windows dialog box
- I check “Windows of active workbook” if needed
This automatically arranges my Excel windows side by side. For fine-tuning, I drag window borders.
I often use “Synchronous Scrolling” to scroll both sheets simultaneously. This feature is invaluable when comparing long datasets.
For complex analyses, I sometimes use Excel’s split screen feature. It lets me view different parts of the same sheet at once, boosting my productivity.
Comparing Data Side by Side
I’ve found that comparing data side by side in Excel is crucial for efficient analysis. It allows me to spot differences quickly and make informed decisions. Let’s explore two powerful methods I use regularly.
Using the Side by Side Feature
When I need to compare two Excel sheets, the View Side by Side feature is my go-to tool. Here’s how I use it:
- I open both workbooks I want to compare.
- In the View tab, I click on “View Side by Side” in the Window group.
- If I have more than two workbooks open, I select the one I want to compare in the dialog box.
This feature is fantastic for visual comparison. I can scroll both sheets simultaneously, which saves me tons of time. For sheets in the same workbook, I use the New Window feature to create a second view.
I find this method particularly useful when I’m comparing financial statements or budget forecasts across different periods.
Applying Conditional Formatting to Highlight Differences
When I need to pinpoint specific differences between datasets, I turn to conditional formatting. It’s a powerful tool that visually highlights discrepancies. Here’s my process:
- I select the range I want to compare in both sheets.
- In the Home tab, I click on Conditional Formatting > New Rule.
- I choose “Use a formula to determine which cells to format“
- I enter a formula like =A1<>Sheet2!A1 to highlight cells that don’t match.
- I pick a format that stands out, like a bright fill color.
This technique is invaluable when I’m reconciling financial data or checking for data entry errors. It instantly draws my eye to discrepancies, making my analysis much more efficient.
Enhancing Productivity with Advanced Views
Excel offers powerful tools to boost efficiency when working with multiple sheets. I’ll share my expertise on mastering split screen techniques and leveraging the Arrange All option to supercharge your productivity.
Mastering Split Screen Techniques
I rely heavily on Excel’s View Side by Side feature for comparative analysis. To activate this, I open two worksheets and click “View Side by Side” in the View tab. This splits my screen horizontally or vertically.
For vertical splits, I use these steps:
- Open desired worksheets
- Click “New Window” in the View tab
- Select “Arrange All“
- Choose a “Vertical” arrangement
I always enable “Synchronous Scrolling” to navigate both sheets simultaneously. This is crucial when comparing financial statements or analyzing trend data across multiple periods.
Pro tip: Use ALT + TAB to quickly switch between views for rapid data entry and validation.
Leveraging the Arrange All Option
The Arrange All feature is my go-to for viewing multiple sheets at once. It’s perfect for dashboard creation and comprehensive financial modeling.
To use Arrange All:
- Open relevant workbooks
- Click “Arrange All” in the View tab
- Select your preferred arrangement (Tiled, Horizontal, Vertical, Cascade)
I often use the Tiled view when working with 3-4 sheets, like balance sheet, income statement, cash flow, and key ratio analysis.
For complex models, I combine Arrange All with custom VBA macros to automate view switching based on specific triggers or data updates. This streamlines my workflow and ensures I’m always looking at the most relevant information.
Quick Demo – Compare Excel worksheets Side-by-Side
Viewing Excel sheets side by side offers powerful tools for efficient data analysis. I’ll explain how to make the most of this feature to boost productivity and gain deeper insights.
Synchronizing Scrolling for Effortless Comparison
When I’m comparing large datasets across multiple sheets, synchronous scrolling is a game-changer. Here’s how I use it:
- Open the sheets I want to compare side by side.
- Click the “Synchronous Scrolling” button in the “View” tab.
- Scroll one sheet – the other will follow automatically.
This feature allows me to quickly spot discrepancies or patterns across sheets. I often use it when reconciling financial statements or comparing monthly sales data.
Pro tip: I combine synchronous scrolling with conditional formatting to highlight differences visually. For long sheets, I also freeze a row in Excel so headers stay visible during review.
Utilizing Freeze Panes for Focused Analysis
Freeze panes are crucial when working with large datasets. Here’s my approach:
- Select the cell below and to the right of where I want to freeze.
- Go to “View” tab > “Freeze Panes” > “Freeze Panes”.
This keeps important headers or identifiers visible while I scroll through data. I use this technique when analyzing long financial reports or extensive customer databases.
For complex analyses, I often split the worksheet into separate panes. This lets me view different sections of the same sheet simultaneously, perfect for comparing top-line revenues with bottom-line profits.
Technical Insights on Excel’s View Features
Excel’s View tab offers powerful tools for analyzing data across multiple sheets. I’ll explore the key functionality and methods to optimize your workspace for side-by-side comparisons.
Understanding View Tab Functionality
The View tab in Excel is crucial for managing multiple worksheets efficiently. I often use the New Window button to create additional views of my workbook. This allows me to see different parts of the same file simultaneously.
After opening new windows, I click on View Side by Side to arrange them automatically. This feature is invaluable when I’m comparing financial data across different periods or departments.
I always enable Synchronous Scrolling for smoother navigation. It lets me scroll through both sheets at the same time, which is perfect for analyzing large datasets.
Resetting Window Position for Clarity
When working with complex financial models, I sometimes need to reset my window positions. The Reset Window Position feature is my go-to solution for this.
I access it through the View tab in the Window group. It’s particularly useful after I’ve been zooming in and out or moving windows around during intense analysis sessions.
By resetting, I ensure all my open windows are perfectly aligned. This clarity is essential when I’m presenting data to executives or running sensitivity analyses across multiple scenarios.
I recommend using this feature regularly to maintain an organized workspace, especially when dealing with data-heavy financial reports or intricate forecasting models.
Best Practices for Excel Efficiency
I’ve found that optimizing Excel workflows and implementing robust data management techniques can dramatically boost productivity. My experience has shown me the critical importance of streamlined processes and sound data practices in financial analysis.
Designing Workflows for Maximum Productivity
I always start by customizing the Excel Ribbon to put my most-used commands at my fingertips. This saves me countless clicks throughout the day. I create custom keyboard shortcuts for frequently used formulas and macros, which speed up my analysis significantly.
I’ve learned to leverage Excel’s data validation features to prevent errors at the source. By setting up drop-down lists and input restrictions, I ensure data integrity from the start. This proactive approach saves hours of troubleshooting later.
I also make extensive use of named ranges and dynamic arrays. These powerful features allow me to create flexible, self-updating models that adapt to changing data sets without manual intervention.
Advanced Techniques for Robust Data Management
In my role I’ve developed a structured approach to data management in Excel. I always start by creating a dedicated data input sheet, separate from the calculation and output sheets. This separation helps maintain data integrity and makes auditing easier.
I utilize Power Query for data cleaning and transformation tasks. Its ability to create repeatable ETL processes has been a game-changer for my workflow. I can refresh complex data sets with a single click, saving hours of manual work.
For large datasets, I’ve found that leveraging PowerPivot and DAX formulas significantly enhances Excel’s capabilities. These tools allow me to work with millions of rows of data efficiently, enabling more comprehensive analyses.
Lastly, I implement version control practices, even within Excel. I use naming conventions and maintain a change log to track modifications. This approach has proven invaluable when collaborating with team members or revisiting analyses months later.
Conclusion
Viewing Excel sheets side by side is a game-changer for financial analysis and data science tasks. I’ve found this technique invaluable for comparing datasets, validating models, and spotting trends quickly.
By arranging windows or using the View Side by Side feature, I can boost my productivity significantly. This approach allows me to cross-reference data points and formulas effortlessly, reducing errors in my financial models.
For complex analyses, I often use:
- Split panes
- New Window function
- Multiple monitors
These methods help me manage large datasets and intricate Excel workbooks more effectively. I can simultaneously view raw data, calculated results, and visualizations, enhancing my ability to draw insights.
I rely on this side-by-side view to:
- Compare actual vs. Projected financials
- Analyze variance reports
- Validate machine learning model outputs
I recommend mastering these techniques to streamline your workflow and improve the accuracy of your financial analyses. With practice, you’ll find yourself navigating complex spreadsheets with ease, making data-driven decisions faster than ever before.
Frequently Asked Questions
Excel offers many ways to view and compare data across sheets and workbooks. I’ll cover key techniques for arranging Excel windows, comparing data, and optimizing your workspace for analysis.
How can I simultaneously view multiple Excel workbooks on one screen for cross-reference and analysis?
I use the “View Side by Side” feature to compare workbooks. Here’s how:
- Open the workbooks you want to compare.
- Go to the View tab.
- Click “View Side by Side” in the Window group.
This arranges your open workbooks next to each other, making it easy to cross-reference data.
What is the method for arranging two Excel worksheets horizontally for comparative purposes?
To view two sheets from the same workbook side-by-side:
- Open your workbook.
- Click “New Window” on the View tab.
- Select different sheets in each window.
- Click “View Side by Side“.
This technique allows you to compare sheets within a single workbook horizontally.
Is there a way to enable the ‘View Side by Side’ option if it’s grayed out in Excel?
If “View Side by Side” is grayed out, it’s likely because:
- You only have one workbook open.
- Your Excel window is maximized.
To fix this, open at least two workbooks and ensure your Excel window isn’t maximized.
How can I split one Excel workbook into several windows to observe different datasets at once?
I often use Excel’s “Split” feature for this:
- Select a cell where you want to split the window.
- Go to the View tab.
- Click “Split” in the Window group.
This divides your worksheet into panes, letting you view different parts of the same sheet simultaneously.
What are the steps to compare and highlight differences between two sets of data in Excel?
To compare data sets:
- Use conditional formatting to highlight differences.
- Create a formula to check for discrepancies.
- Use Excel’s built-in “Compare Sheets” feature.
For detailed comparisons, I recommend using Power Query to merge and compare datasets efficiently.
Can I extend my Excel workspace to use multiple monitors effectively when analyzing extensive data?
Yes, I frequently use multiple monitors for Excel analysis:
- Extend your desktop across monitors in Windows settings.
- Drag Excel windows to different screens.
- Use “View Side by Side” across monitors.
This setup significantly boosts productivity when working with large datasets or complex models.
